DIY Computer: Unterschied zwischen den Versionen
Aus exmediawiki
Verena (Diskussion | Beiträge) |
Verena (Diskussion | Beiträge) |
||
| Zeile 34: | Zeile 34: | ||
! x !! MATERIALS !! MATERIALIEN | ! x !! MATERIALS !! MATERIALIEN | ||
|- | |- | ||
| || Chassis: || Gehäuse | | || '''Chassis:''' || '''Gehäuse:''' | ||
|- | |- | ||
| 2 || 5 X 8 X 1/8 in. composition boards || Beispiel | | 2 || 5 X 8 X 1/8 in. composition boards || Beispiel | ||
|- | |- | ||
| | | 6 || Beispiel || Beispiel | ||
|- | |- | ||
| | | 12 || 1/2 in. wood screws || Holzschrauben | ||
|} | |} | ||
Version vom 30. April 2020, 13:48 Uhr
HOW TO BUILD A WORKING DIGITAL COMPUTER
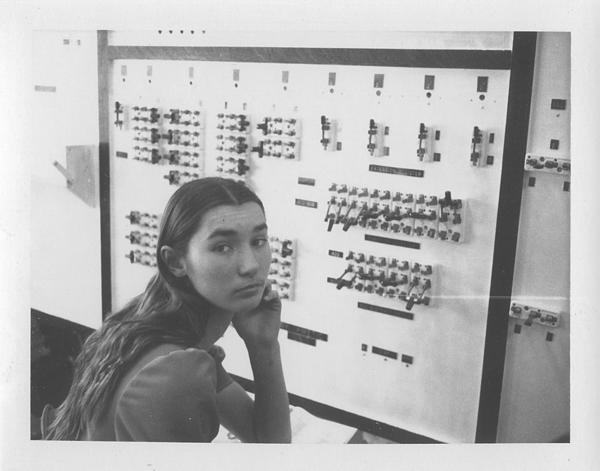
Dawn LeClair, member of the 1975 Wickenburg High School Math Club, sits in front of the paper clip computer (Wickenburg High School)
- https://archive.org/details/howtobuildaworkingdigitalcomputer_jun67
- https://www.evilmadscientist.com/2013/paperclip/
- https://hackaday.io/project/168833-wdc-1-a-working-digital-computer
- https://hackaday.com/2015/10/19/diy-computer-1968-style/
SONSTIGE LINKS:
- https://www.rechnen-ohne-strom.de/links-lit-anleit/bauanleitungen/
- https://www.instructables.com/id/How-to-Build-an-8-Bit-Computer/
Tatsächlich gebaute Geräte basierend auf dem Buch:
- “Emmerack”, Cleveland 1972 (albeit substituting Radio Shack slide switches for most of the paper clips)
- Wickenburg High School Math Club in Arizona, 1975
- at least one modern build has been completed, see youtube
- Arkay (later, Comspace) CT-650 computer trainer
Eingabegerät – Encoder
| x | MATERIALS | MATERIALIEN |
|---|---|---|
| Chassis: | Gehäuse: | |
| 2 | 5 X 8 X 1/8 in. composition boards | Beispiel |
| 6 | Beispiel | Beispiel |
| 12 | 1/2 in. wood screws | Holzschrauben |
